As the temperatures rise during the summer months, keeping your home cool becomes a top priority. One effective way to combat the heat and reduce your energy bills is by installing a solar attic fan. These fans are designed to ventilate your attic space by drawing out hot air and moisture, helping to regulate the temperature in your home. In this article, we will explore how a solar attic fan installation can keep your home cool and comfortable throughout the summer.
The Benefits of a Solar Attic Fan
1. Energy Efficiency
- Solar attic fans are powered by the sun, which means they do not require electricity to operate.
- By using solar power, these fans can help reduce your energy consumption and lower your utility bills.
2. Improved Air Quality
- By ventilating your attic space, a solar attic fan can help prevent the buildup of mold, mildew, and other harmful pollutants.
- Improved air circulation can also help reduce allergens and improve overall air quality in your home.
How Solar Attic Fans Work
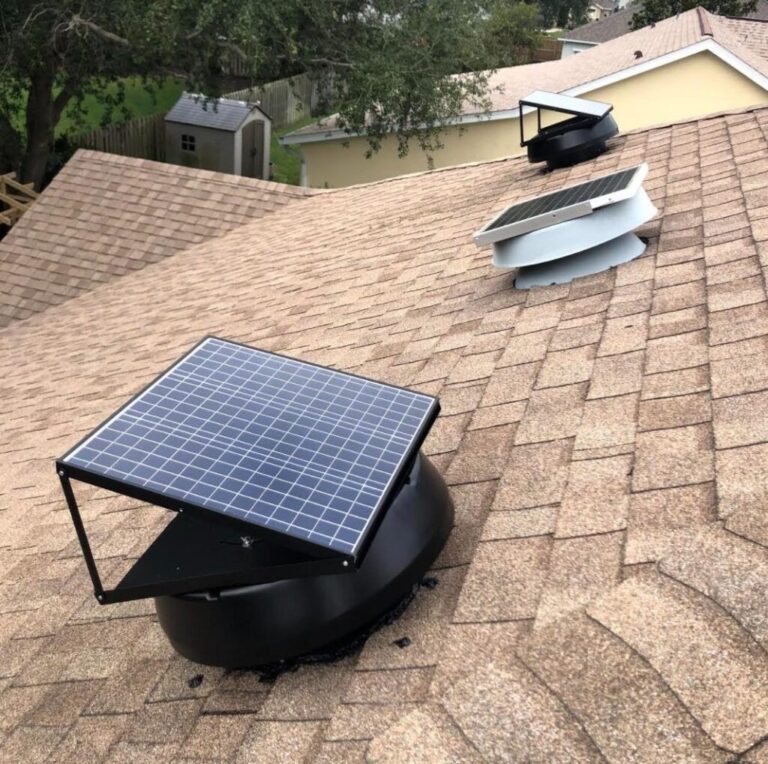
Solar attic fans work by using photovoltaic cells to convert sunlight into electricity, which powers the fan. These fans are installed on the roof of your home and are designed to draw hot air and moisture out of your attic space. As the fan operates, it creates a negative pressure inside the attic, causing cooler air from outside to be drawn in through the soffit vents. This continuous cycle of air circulation helps to regulate the temperature in your attic and prevent heat buildup in your home.
Factors to Consider Before Installation
1. Roof Orientation
- For optimal performance, it is important to consider the orientation of your roof and the amount of sunlight it receives throughout the day.
- Solar attic fans work best on south-facing roofs that receive ample sunlight.
2. Attic Size
- The size of your attic will determine the number and size of solar attic fans needed to effectively ventilate the space.
- It is important to measure your attic space and consult with a professional to determine the appropriate fan size and placement.
Installation Process
The installation of a solar attic fan is a relatively straightforward process that can be completed by a professional or experienced DIYer. Here is an overview of the installation process:
1. Roof Inspection
- Prior to installation, a roof inspection should be conducted to assess the condition of the roof and identify any potential obstacles.
- It is important to ensure that the roof can support the weight of the fan and that there are no obstructions in the installation area.
2. Fan Mounting
- The solar attic fan is mounted on the roof surface, typically near the peak of the roof for optimal ventilation.
- A hole is cut in the roof to accommodate the fan, and the fan is secured in place using mounting brackets.
3. Electrical Connection
- The fan is connected to the attic space through a duct or vent, allowing hot air to be drawn out of the attic.
- The fan is also connected to a solar panel, which powers the fan using sunlight.